

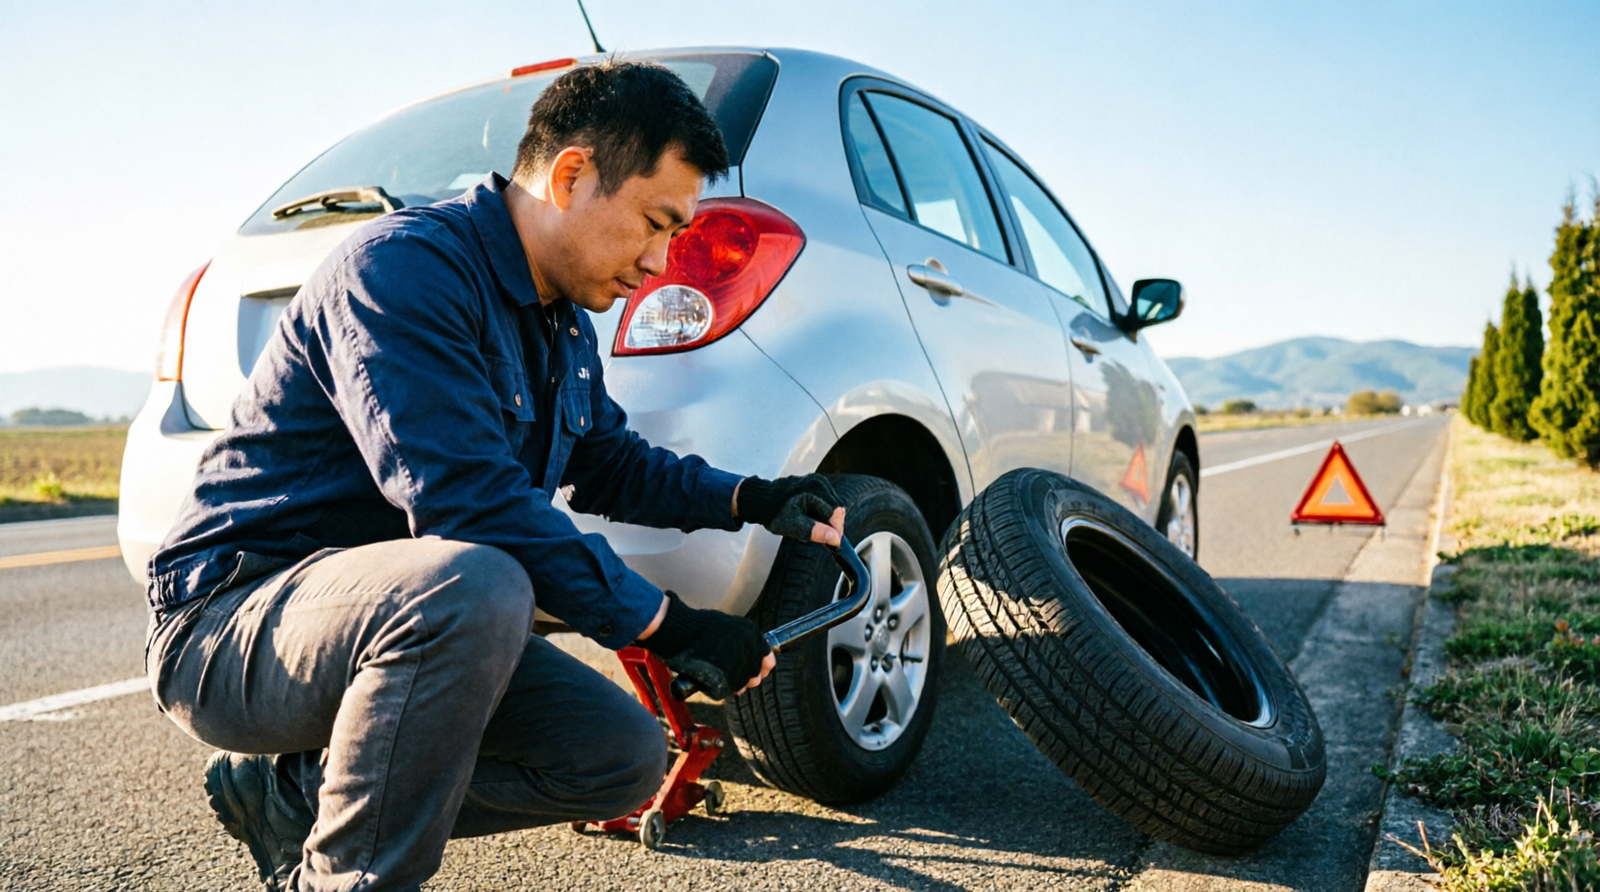
A flat tire has a way of showing up at the worst possible moment. The good news is that changing a tire isn’t complicated once you know the steps — it’s mostly about staying safe, having the right tools, and working through the process without rushing. Here’s exactly what to do, from the moment you feel that wobble to the moment you’re back on the road.
How to Tell It’s Actually a Flat
A flat isn’t always obvious right away. Watch for a car that suddenly pulls to one side, a thumping sound as you drive, a steering wheel that vibrates more than usual, or a dashboard tire-pressure warning light. Any of these is a good reason to find a safe spot and check your tires before continuing.
What You’ll Need Before You Start
From my own experience: I drive a Toyota Corolla GLi, and it comes with a full-size spare, so I never have to worry about “donut” speed limits. If your car has a full-size spare like mine, you can drive normally afterward, but get the flat tire checked soon.
Most vehicles with a traditional spare come with everything required for a basic tire change. Still, it’s worth confirming what you have before you’re stuck on the shoulder trying to figure it out.
| Tool or Item | What It’s For |
| Jack | Lifts the vehicle off the ground |
| Lug wrench | Loosens and tightens lug nuts |
| Spare tire | Replaces the damaged tire |
| Wheel chocks | Keeps the car from rolling |
| Gloves | Protects your hands |
| Flashlight | Helps you see in low light |
Check your owner’s manual ahead of time — it’ll show you exactly where your jack, spare, and lifting points are located. Not every car has a full-size spare anymore; some newer models come with a compact “donut,” a tire repair kit, or run-flat tires instead. Knowing which one you have matters, since the process (and what you’re allowed to do afterward) is different for each. If your car has locking lug nuts, make sure you have the special key before you get started; it’s often clipped inside the glovebox or stored with the jack.
It’s smart to check your spare occasionally, too. A flat tire is a bad time to discover your spare is also flat.
Jack Types: What You’re Likely Working With
Most passenger cars come with a scissor jack, which is compact and works fine for a roadside change but can feel a little wobbly if you’re not used to it. Trucks and SUVs sometimes include a bottle jack instead, which offers more lifting capacity. Either way, the jack that came with your vehicle is matched to its weight and lifting points, so it’s generally better to use that one rather than a generic jack you bought separately, unless you’ve confirmed it’s rated for your car.
Find a Safe Spot Before You Do Anything Else
Before you touch a single tool, focus on getting yourself and your car out of harm’s way.
If you feel a tire losing air while driving, ease off the gas and avoid sudden braking or steering. Look for a flat, stable area away from moving traffic — a parking lot, a wide shoulder, or a side street all work better than a busy lane. Once you’ve stopped, turn on your hazard lights and set the parking brake.
A flat on a quiet street is a very different situation than a flat on a highway. If traffic is moving fast and you don’t have much room to work, it may be safer to stay in the car and call for help rather than get out.
When to Call Roadside Assistance Instead
Changing your own tire isn’t always the right call. Consider phoning for help if:
- You’re stopped somewhere unsafe, like a highway shoulder with fast traffic
- The ground is soft, sloped, or unstable
- You don’t have the correct jack, spare, or tools
- The vehicle has other visible damage
- Poor weather or low visibility makes the job risky
- You’re simply not confident using the equipment
There’s no prize for doing it yourself if the conditions aren’t safe. Roadside assistance exists for exactly this reason.
How to Change a Flat Tire, Step by Step
Once you’ve found a safe, level spot, you’re ready to get to work.
Step 1: Secure the Vehicle
Turn off the engine, apply the parking brake, and shift into Park (or the gear recommended in your manual if you drive a manual transmission). Grab your spare, jack, and lug wrench, and place wheel chocks around the tires that will stay on the ground if you have them.
If a hubcap or wheel cover is blocking the lug nuts, remove it now.
Step 2: Loosen the Lug Nuts
From my own experience: Loosening the lug nuts was the hardest part for me. They were on tight, and it took real effort to break them free. That’s why this step comes before you lift the car. While the tire is on the ground it can’t spin, and you can push firmly on the wrench without the car moving.
While the tire is still firmly on the ground, use the lug wrench to loosen each lug nut by turning it counterclockwise. You’re not removing them yet — just breaking them free. Work your way around the tire, loosening each nut a little at a time rather than fully removing one before moving to the next.
If a nut won’t budge, don’t force it with unsafe tricks. Stripped hardware makes everything harder.
Step 3: Position the Jack and Lift the Car
From my own experience: I once placed the jack in the wrong spot. Nothing happened that time, but I was lucky. Now I always check the owner’s manual for the jack points first, because a slipping jack is how people get hurt.
Check your owner’s manual for your vehicle’s designated jack points — these are reinforced sections built to handle the car’s weight. Placing the jack anywhere else risks damaging the frame or having the jack slip.
Raise the vehicle slowly until the flat tire is fully off the ground, with enough room for the spare. A fully inflated spare is taller than a flat tire, so lift a few inches higher than you think you need — roughly 6 inches (15 cm) is typical. Watch the jack as it rises, and if it leans, sinks, or wobbles, lower the car and reposition it. Never put any part of your body under a car held up only by a jack.
Step 4: Remove the Flat Tire and Mount the Spare
Finish removing the lug nuts and set them aside somewhere they won’t roll away. Grip the tire with both hands and pull it straight toward you. If it’s stuck to the hub from rust or buildup, don’t reach or crawl underneath the car to free it — that’s a job for roadside assistance.
Line up the spare with the wheel studs, push it into place, and thread the lug nuts on by hand. If any nut feels like it’s not catching correctly, stop and recheck the alignment instead of forcing it.
Take a Quick Look at the Damaged Tire
Before you put the flat aside, glance at what caused the problem. A visible nail or screw in the tread often means a repairable puncture. A gash along the sidewall, on the other hand, usually means the tire is done for good and shouldn’t be repaired or reused. This quick check can save you a wasted trip to a shop that can’t do anything with a sidewall-damaged tire.
Step 5: Lower the Car and Tighten the Lug Nuts
Snug the lug nuts by hand in a star or crisscross pattern so the wheel seats evenly, but hold off on full tightening for now. Lower the vehicle slowly with the jack until the spare is fully supporting the car’s weight, then remove the jack.
With the car back on the ground, use the lug wrench to tighten the nuts the rest of the way, still working in that crisscross pattern. If you know your vehicle’s torque specification, a torque wrench will get it exactly right — that spec is usually listed in the owner’s manual.
Common Mistakes That Make Tire Changes Harder
How Long Does It Really Take?
Time depends mostly on experience.
| Experience Level | Typical Time | What Slows It Down |
|---|---|---|
| First-timer | 30–60 minutes | Reading instructions, finding tools, hesitating at the jack |
| Done it a few times | 15–25 minutes | Occasional stuck lug nuts |
| Practiced regularly | Under 15 minutes | Rarely an issue |
There’s no prize for speed. Rushing to save ten minutes isn’t worth a poorly tightened lug nut or a badly placed jack.
A few missteps account for most of the trouble people run into.
| Mistake | Why It’s a Problem |
| Using the wrong jack point | Can damage the car or make the jack unstable |
| Working on soft or sloped ground | The jack may shift or tip |
| Removing lug nuts before lifting | The tire can spin while you work |
| Guessing on tightness | Over- or under-tightening damages hardware |
| Ignoring spare tire limits | Can lead to a blowout or handling issues |
| Changing a tire near fast traffic | Puts you at serious risk |
Rushing is the root cause of most of these. Your first tire change will take longer than 20 to 30 minutes, and that’s normal — there’s rarely a reason to cut corners..
Driving on a Spare: What You Need to Know
Before you drive off, check the spare’s air pressure. A full-size spare usually takes the same pressure as your other tires, which is listed on the driver’s-side door-jamb sticker. A compact “donut” spare often needs a much higher pressure, which you’ll find in your owner’s manual or printed on the spare itself.
| Spare Type | Typical Speed Limit | Typical Distance Limit |
|---|---|---|
| Full-size spare | Same as regular tires | No specific limit |
| Compact “donut” spare | 50 mph | 50–70 miles |
If your vehicle uses a compact “donut” spare, treat it as a temporary fix, not a long-term solution. These spares typically come with speed limits (often around 50 mph) and distance restrictions (commonly 50–70 miles), which you can find in your owner’s manual or printed on the tire itself.
Get your damaged tire to a shop as soon as it’s practical. A qualified technician can tell you whether it’s repairable or needs to be replaced — punctures in the tread are often fixable, while sidewall damage usually isn’t.
After the Tire Change: Final Checks
Before you drive off, take a minute to double-check your work:
- All lug nuts are on and tightened
- The spare is seated properly and looks correctly inflated
- The jack and tools are packed away securely
- The damaged tire is stored safely in the car
- Nothing was left behind on the road
At your first safe stop, check the pressure in the spare and the other three tires. Use the number on the sticker inside the driver’s door jamb, not the maximum printed on the tire’s sidewall — that’s a ceiling, not a target.
Once you’re driving again, pay attention to how the car feels. Unusual vibration, pulling to one side, or new noise is worth pulling over for and having checked out.
Preventing Flat Tires and Staying Prepared
Practice Now So It’s Easy Later
The best time to learn is on a quiet weekend, not during a breakdown. A short practice run at home lets you:
- Confirm your jack works and fits where it should
- Find your specific jack points without guessing
- Feel how much force it takes to loosen the lug nuts
- Build confidence before it matters
You don’t even need to remove the wheel. Just going through the motions once removes most of the uncertainty.
You can’t avoid every flat, but you can lower the odds and make the ones that do happen easier to handle.
- Check tire pressure monthly. Underinflated tires wear unevenly and are more prone to blowouts. Your recommended PSI is listed on the driver’s-side door-jamb sticker, not on the tire itself.
- Inspect tread depth regularly. A quick way to check is the penny test: insert a penny into the tread with Lincoln’s head facing down. If you can see all of his head, it’s time for new tires.
- Rotate tires on schedule. Most manufacturers recommend rotation every 5,000–7,500 miles to even out wear.
- Keep your spare and tools accessible. A spare buried under cargo or a jack you’ve never located is far harder to deal with in the moment.
- Watch for road hazards. Potholes, curbs, and debris are common causes of sudden flats, especially in winter when road surfaces deteriorate.
A few minutes of routine maintenance goes a long way toward keeping you off the shoulder in the first place.
FAQs
Is changing a tire easy for a complete beginner?
Yes, most beginners can manage it by following their owner’s manual. The first attempt just takes longer than later ones.
How long does changing a tire usually take?
Around 20–30 minutes for most drivers, though road conditions and vehicle type can add time.
Is it safe to change a tire on the highway shoulder?
Only if you can get well clear of moving traffic on stable ground. Otherwise, call roadside assistance.
Should I loosen the lug nuts before jacking up the car?
Yes — loosen them slightly while the tire is still on the ground so it doesn’t spin while you work.
How far can I drive on a temporary spare?
It depends on your vehicle, but many compact spares are limited to about 50–70 miles at reduced speed. Check your manual.
What if a lug nut won’t come loose?
Don’t force it with risky methods. Call a roadside service or tire shop instead.
What if my car doesn’t have a spare tire?
Many newer vehicles use a repair kit or run-flat tires instead. Your owner’s manual will explain the correct procedure.
Can a flat tire always be repaired instead of replaced?
Not always. Tread punctures are often repairable, but sidewall damage or major wear usually means replacement.
How often should I check my spare’s air pressure?
Check it alongside your regular tires, and before any long road trip. Spares lose pressure over time even when they’re never used.
Should I use a torque wrench to tighten the lug nuts?
Yes, if you have access to one. It lets you hit the exact torque your manufacturer recommends, which protects both the wheel and the studs.
Related Guides
Final Thoughts
Changing a flat tire comes down to a few core steps: stop somewhere safe, secure the car, use the correct jack point, mount the spare properly, and tighten everything before you drive off. When in doubt — especially about safety — calling for roadside help is always the better call. A little preparation now makes the whole process far less stressful later.