

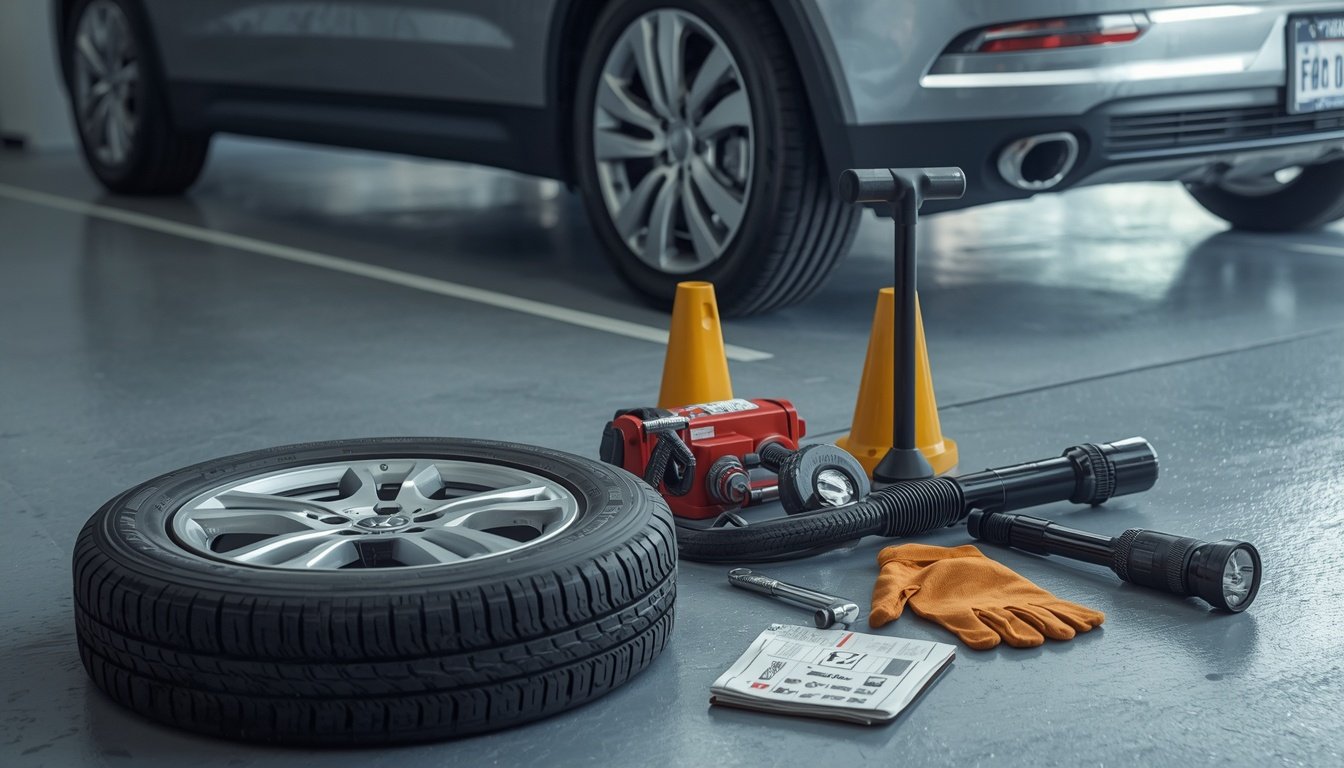
Nobody plans for a flat tire. It usually happens on a busy commute, a long road trip, or a quick errand run — and the last thing you want is to be stuck without the right gear. The good news is that the things you need to change a tire are simple, inexpensive, and often already sitting in your trunk. This guide walks through each item, what it does, and how to be ready before you’re standing on the shoulder of a highway trying to figure it out.
The Essential Things You Need to Change a Tire
At a minimum, changing a tire requires a way to lift the car, a way to remove the wheel, and a tire to put in its place. Everything else makes the job safer or more comfortable, but these core items are non-negotiable.
| Item | What It Does |
| Spare tire | Replaces the flat so you can keep driving |
| Car jack | Raises the vehicle off the ground |
| Lug wrench | Loosens and tightens the lug nuts |
| Wheel chocks | Keeps the car from rolling while it’s lifted |
| Gloves | Protects hands from brake dust and sharp edges |
| Flashlight | Helps you see in low light or at night |
| Owner’s manual | Shows jack points and spare-tire specs for your car |
Most factory tire kits include the jack, lug wrench, and spare, tucked under the trunk floor or cargo area. It’s worth digging yours out ahead of time just to confirm everything is present and in working order — finding a missing jack handle in the dark is a bad surprise.
It only takes a few minutes to do a dry run at home: pop the trunk, locate every piece of the factory kit, and physically hold the lug wrench up to a wheel to make sure it’s the right size. Some used cars are missing a tool or two from a previous owner, and rental cars in particular are notorious for incomplete kits. Finding that out in your driveway is a minor inconvenience; finding it out on the interstate is not.
Your Spare Tire: What Type Do You Have?
Not every car carries the same kind of spare, and knowing which one you have changes how you should treat it. A full-size spare matches your regular tires in size and can typically be driven on like a normal tire. A compact spare, often called a “donut,” is smaller, lighter, and only meant to get you to a repair shop.
| Full-Size Spare | Compact Spare |
| Matches regular tire dimensions | Noticeably smaller and narrower |
| Usually no speed restriction | Often limited to around 50 mph |
| Can be driven longer distances | Meant for short trips only |
| Takes up more trunk space | Compact and lightweight |
Some newer vehicles skip the spare entirely, relying instead on run-flat tires or a sealant-and-inflator kit. If you’re not sure what your car has, check under the cargo floor or look in the owner’s manual.
Checking Your Spare Before You Need It
A spare that’s been sitting untouched for years can let you down just as easily as the tire it’s meant to replace. A few times a year, take a minute to check:
- Air pressure (spares lose air slowly over time, even unused)
- Tread depth and any visible cracking, especially on older rubber
- Rust or corrosion around the wheel itself
- That it’s actually the correct size for your vehicle
This takes less than five minutes and can save you from discovering a second flat tire — the spare — right when you need it most.
The Jack: Lifting Your Vehicle Safely
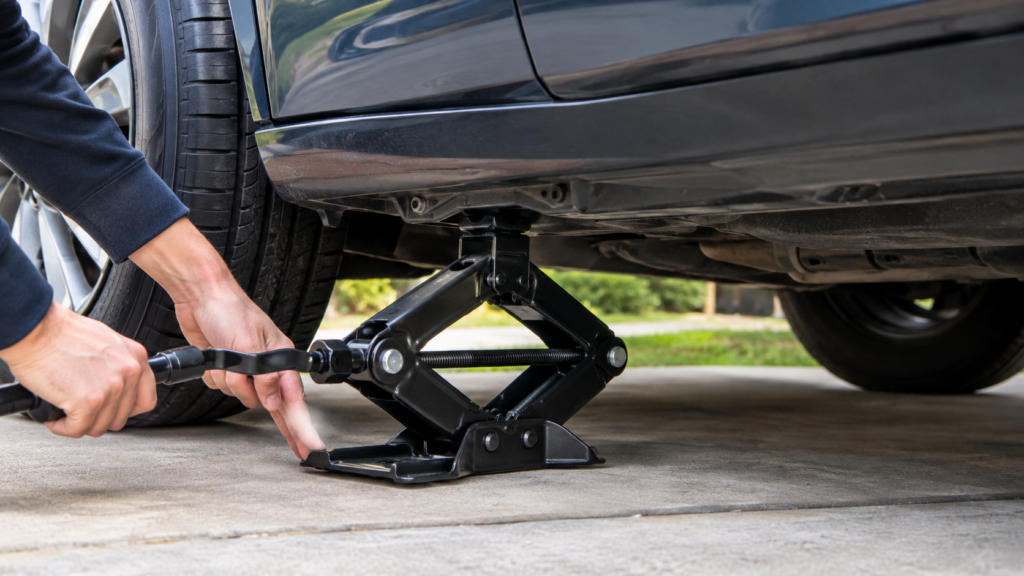
A jack is what makes the whole process possible. Most vehicles come with one sized specifically for that model, often paired with a jack handle or extension bar to turn it. You’ll usually find it under the trunk liner, in a side panel, or bolted beneath the vehicle itself.
Skip the temptation to improvise with cinder blocks, wood stacks, or anything not designed to bear a car’s weight. A vehicle can weigh well over a ton, and an unstable lift is one of the most dangerous parts of a DIY tire change.
Most factory kits include a compact scissor jack, which is light and easy to store but requires more turns of the handle to raise the car fully. Some drivers choose to add a small hydraulic bottle jack to their own kit instead, since it lifts faster and feels more stable, though it takes up more trunk space. Either type works fine for a roadside change as long as it’s rated for your vehicle’s weight.
Finding Your Vehicle’s Jack Points
Cars have specific, reinforced spots along the frame designed to hold the jack safely — these are called jack points, and they’re usually pictured in the owner’s manual. Placing the jack anywhere else risks bending the frame, cracking plastic trim, or having the car slip off the jack mid-lift. When in doubt, match what you see under the car to the diagram in the manual before you start lifting.
Lug Wrench Basics and Locking Lug Nuts
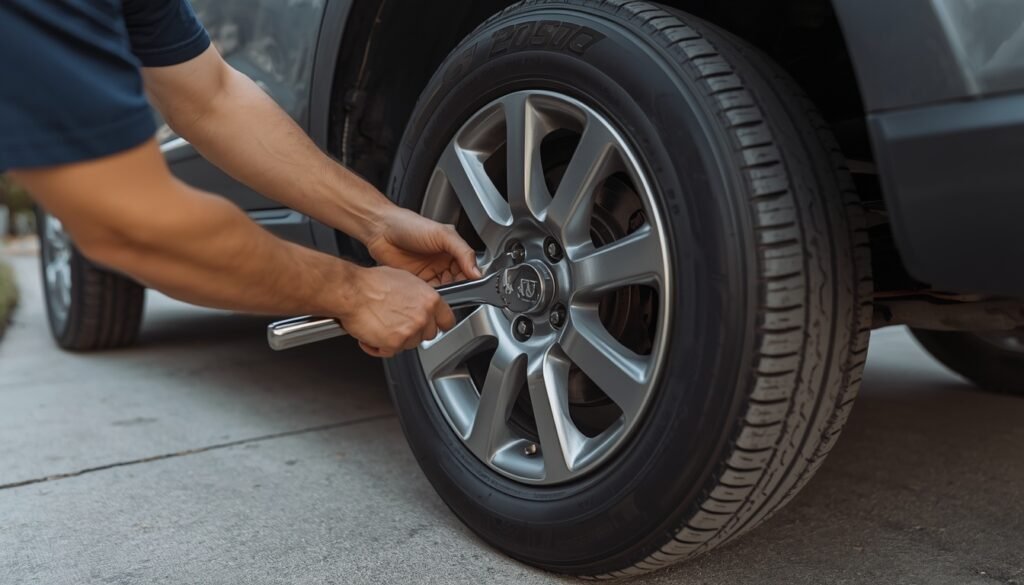
The lug wrench is what actually gets the wheel off. Factory kits usually include a simple L-shaped wrench, though a cross-shaped, four-way wrench gives you more leverage if you ever need to buy your own.
The trick most people miss: loosen each lug nut slightly before raising the car, while the tire still has grip on the ground. Trying to break a stuck lug nut loose once the wheel is spinning freely in the air is far harder and less safe.
If a nut won’t budge, standing on the end of the wrench (carefully, with the car still on the ground) or using your body weight rather than just your arms usually provides enough leverage. Turn counterclockwise to loosen, clockwise to tighten — a detail that’s easy to blank on when you’re crouched by the curb in a hurry.
Dealing With Locking Lug Nuts
Many cars use one locking lug nut per wheel as an anti-theft measure, which requires a matching key-shaped socket to remove. That key is usually stored in the glovebox or with the factory tools — and it’s genuinely useful only if it’s actually in the car when you need it, not sitting in a drawer at home.
Wheel Chocks, Gloves, and Other Safety Basics
Wheel chocks are small wedges placed against the tires still touching the ground, keeping the car from rolling while it’s jacked up. If you’re changing a front tire, chock the rear wheels, and vice versa. They’re cheap, and they do a job that a rock or brick can’t do reliably.
A pair of work gloves keeps your hands away from road grime, brake dust, and sharp metal edges on the wheel and hubcap. They’re not strictly required, but most people are glad to have them once they see how dirty a tire change actually is. Solid, closed-toe shoes matter too — this isn’t the job for sandals or flip-flops.
On a slight incline, chock both sides of the wheel diagonally opposite the one being lifted, not just one side — a car can roll either direction if the parking brake or transmission doesn’t fully hold it. If you don’t have proper chocks on hand, large, sturdy rocks are a better emergency substitute than nothing, though they’re still a step down from the real thing.
Flashlight, Tire Gauge, and Extra Kit Items
Flat tires don’t wait for daylight. A flashlight, or better yet a hands-free headlamp, makes it far easier to spot jack points, lug nuts, and any hazards around the vehicle after dark.
A tire pressure gauge isn’t required to swap a wheel, but it’s one of the most useful items you can keep in the car afterward. Once the spare is on, checking its pressure against the number on the driver’s door-jamb sticker (or the spare’s own sidewall) confirms it’s actually safe to drive on.
A few other additions round out a solid roadside kit:
- Reflective vest and warning triangles for visibility near traffic
- A small foam kneeling pad, since pavement is unforgiving
- Hand wipes or a rag for cleanup afterward
- A portable tire inflator for slow leaks
- A rain poncho, because flats rarely happen in good weather
None of these replace the essential tools, but they make an already unpleasant situation noticeably easier.
Step-by-Step: Getting Ready to Change the Tire
Once you’ve confirmed you have everything you need, where and how you stop matters just as much as the tools themselves.
- Slow down gradually — avoid hard braking or sudden steering.
- Pull onto a flat, stable surface away from moving traffic.
- Shift into Park (or leave a manual in gear) and set the parking brake.
- Turn on your hazard lights.
- Move passengers away from the roadside if it’s not safe to wait in the car.
- Retrieve the spare, jack, and lug wrench.
- Place wheel chocks against the appropriate tires.
- Locate the correct jack point before lifting.
Never get underneath a car that’s only supported by a jack — if it shifts or slips, there’s no room for error.
What to Check After Installing the Spare
Getting the spare on isn’t quite the finish line. Before pulling back onto the road, confirm every lug nut is torqued down properly — a torque wrench is ideal, but if you don’t have one, plan to get them checked at a shop soon. Double-check the spare’s air pressure against the recommended figure, since a soft spare handles poorly and wears unevenly.
If it’s a compact spare, respect its speed and distance limits. Treating a donut like a full tire is one of the more common mistakes drivers make, and it can lead to a second breakdown before you’ve even reached a repair shop.
It’s also worth a quick look at the flat tire itself before tossing it in the trunk. A single puncture from a nail or screw is often repairable, while a sidewall gash, a blowout, or damage to the wheel usually means a full replacement. Knowing which one you’re dealing with helps you set expectations before you even reach the shop.
When to Call Roadside Assistance Instead
Having the right tools doesn’t mean every flat should be handled solo. It’s worth calling for help instead of changing the tire yourself if:
- You’re stopped on a narrow shoulder with traffic passing close by
- The ground is soft, muddy, or otherwise unstable
- You’re missing the correct jack, lug wrench, or locking-lug key
- The vehicle has visible damage beyond the flat tire itself
- You’re unsure where the jack points are located
- Weather conditions make working outside genuinely unsafe
A roadside assistance membership or your insurance provider’s towing benefit can be worth far more than the cost of a service call in situations like these.
Conclusion
At its core, the list of things you need to change a tire is short: a spare, a jack, a lug wrench, and a safe spot to work. Wheel chocks, gloves, a flashlight, and a tire gauge round things out and make the job noticeably less stressful. Keep these items together, check your spare a few times a year, and know when a situation calls for professional help instead of a DIY fix on the shoulder of the road.
Frequently Asked Questions
What are the basic things you need to change a tire?
A spare tire, a car jack, and a lug wrench are the essentials. Wheel chocks, gloves, and a flashlight make the job safer.
Do I really need a torque wrench?
Not to remove the wheel, but it’s the most reliable way to tighten lug nuts to the correct spec afterward.
Can I change a tire without a jack?
No — you need a stable, purpose-built way to lift the car. Improvised supports aren’t safe for this job.
Should I check my spare’s air pressure regularly?
Yes. Spares lose pressure slowly over time even when they’re never used, so check them a few times a year.
Do all vehicles come with a spare tire?
No. Many newer models use run-flat tires or a sealant-and-inflator kit instead of a traditional spare.
How far can I drive on a compact spare?
It depends on the vehicle, but most compact spares are rated for limited speed and short distances only — check the sidewall and owner’s manual.
When should I call roadside assistance instead of doing it myself?
Call for help if you’re in an unsafe spot, missing the right tools, or unsure how to safely lift your specific vehicle.