

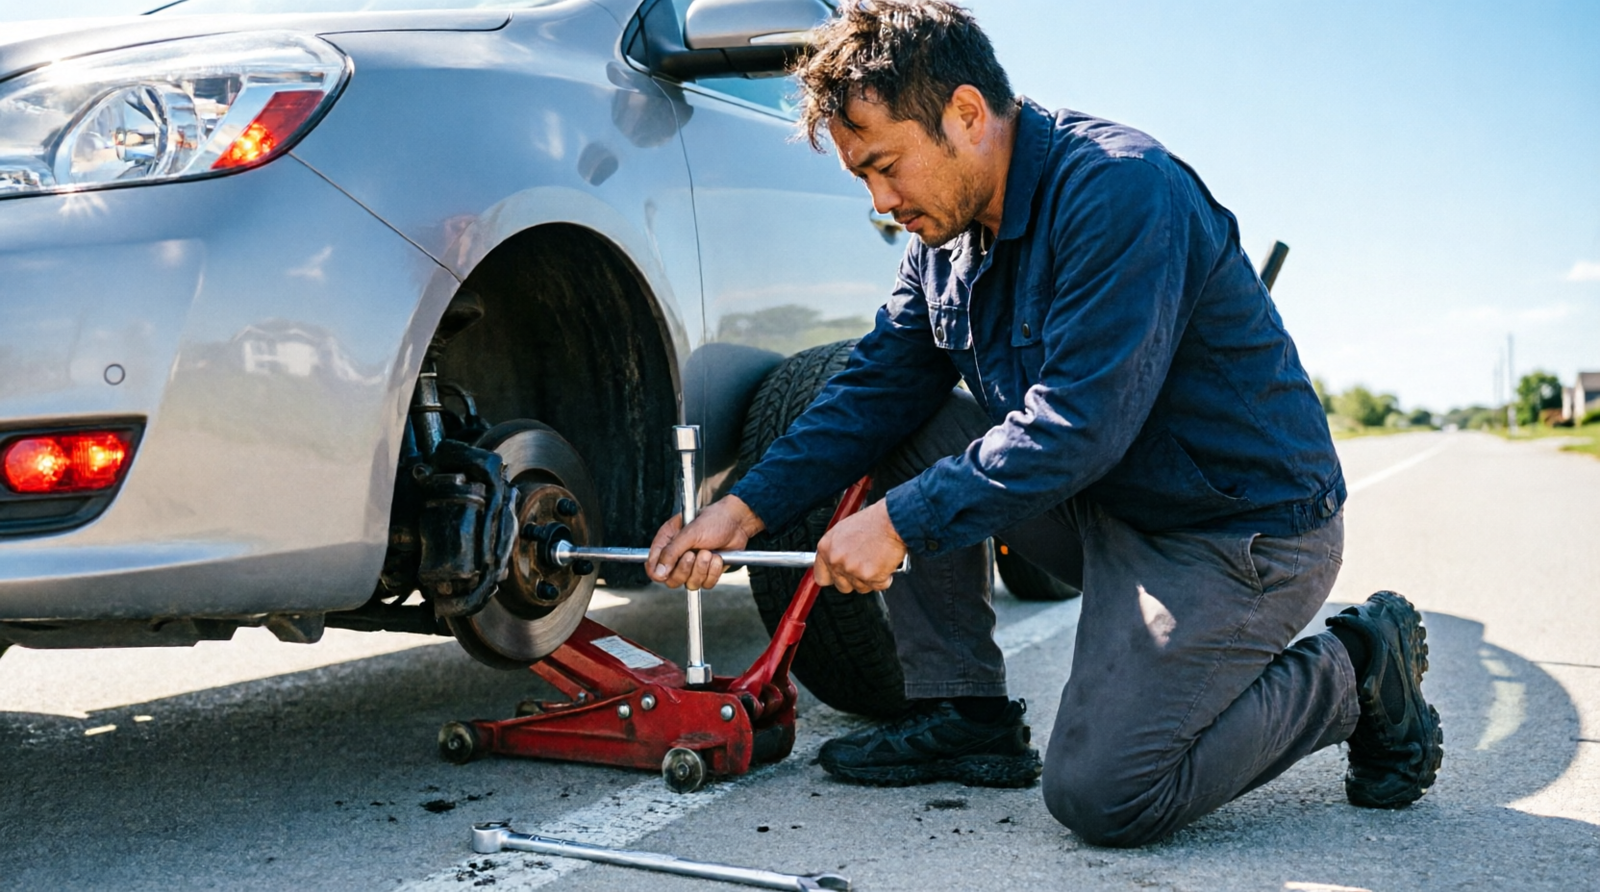
A flat tire always seems to happen at the worst possible moment. The good news is that if you have a properly inflated spare and the right tools, you can usually handle it yourself in under 30 minutes. This guide walks you through putting on a spare tire safely, from choosing a safe spot to checking everything before you drive off.
What You Need Before Putting on a Spare Tire
Most vehicles come with a basic tire-changing kit, though the exact contents vary by make and model. Before you touch a single lug nut, make sure you have everything on hand.
| Item | Purpose |
| Spare tire | Replaces the flat tire |
| Jack | Raises the vehicle off the ground |
| Lug wrench | Removes and tightens lug nuts |
| Wheel chocks | Helps keep the vehicle from rolling |
| Gloves | Protects your hands and keeps them cleaner |
| Flashlight | Helpful for nighttime tire changes |
| Owner’s manual | Shows jack points and tire-specific instructions |
If any of your lug nuts are locking lug nuts, you’ll also need the matching wheel lock key. Without it, that wheel isn’t coming off.
It’s also worth knowing what kind of spare you have. A full-size spare functions like a regular tire, while a temporary spare — often called a donut — is smaller and meant for short-term use only. Check the sidewall for speed and distance limits before you rely on it.
Full-Size Spare vs. Temporary Spare
The two types aren’t interchangeable in how they should be used. A full-size spare matches the diameter of your other tires, so it handles close to normal and can typically stay on the car until you’re ready to deal with the flat. A temporary spare is narrower and lighter, built to save trunk space rather than perform like a standard tire. Most manufacturers cap donut use around 50 mph and 50-70 miles, though the exact figures vary, so always confirm with the sidewall markings or your owner’s manual before hitting the highway.
Find a Safe Place to Change the Tire
Where you stop matters just as much as how you change the tire. If you get a flat while driving, ease off the gas and look for a safe spot away from moving traffic — a parking lot, a wide shoulder, or any flat, stable area works better than the edge of a busy road.
Avoid Unsafe Ground
Stick to firm, level surfaces whenever you can. Soft shoulders, steep slopes, and loose gravel make it easy for a jack to sink or shift mid-lift, which is dangerous.
Once you’ve parked, put the transmission in Park (or leave it in gear if you’re driving a manual, per your owner’s manual), and set the parking brake. Turn on your hazard lights right away, especially if traffic is close by.
If you can’t find a safe spot or the shoulder feels too tight, don’t force it. Call roadside assistance instead — no tire change is worth risking your safety over.
Prepare the Vehicle Before Lifting It
With the car parked and secured, take a few minutes to get set up. Turn off the engine, and ask any passengers to wait somewhere away from traffic and the vehicle itself.
If you have wheel chocks, place them as your manual describes to help prevent rolling. Then grab your spare, jack, and lug wrench, and give the spare a quick visual check for proper inflation and obvious damage.
Locate the flat tire and find the lug nuts holding the wheel in place. Don’t lift the car yet — the wheel needs to stay on the ground a bit longer.
Loosen the Lug Nuts Before Using the Jack
This step trips people up more than any other, so it’s worth doing in the right order. Fit the lug wrench snugly over the first lug nut and turn it counterclockwise using steady, even pressure rather than a sudden jerk.
You only need to loosen each nut about one turn at this stage — not remove it completely. Work your way around the wheel until every lug nut is loosened. Keeping the tire on the ground while you do this gives it the resistance it needs so the wheel doesn’t just spin.
What If a Lug Nut Won’t Move?
Don’t lean on the wrench with everything you’ve got — you risk stripping the nut or damaging the tool. If your car has locking lug nuts, double-check you’re using the correct key. And if a nut is badly seized or damaged, it’s time to call a tire professional or roadside assistance rather than risk it.
Position the Jack and Raise the Vehicle
Every vehicle has a designated lifting point, and it’s not something you should guess at. Your owner’s manual will show you exactly where it is — usually a reinforced section of the frame near each wheel, though the exact location varies between models.
Placing the jack anywhere else can dent the body or, worse, cause the vehicle to slip while it’s raised. Set the jack on firm, level ground directly under that point, and double-check the alignment before you start lifting. One rule that’s non-negotiable: never put any part of your body underneath a vehicle that’s only supported by a jack.
Raising the Vehicle Safely
Once the jack is properly positioned, begin lifting slowly. Keep an eye on it as it rises — if it tilts, shifts, or looks unstable at any point, stop and reposition it before continuing.
You only need to raise the vehicle until the flat tire clears the ground by an inch or two. Lifting higher than necessary just adds instability without any benefit. Once the wheel is off the ground, stay clear of the underside of the car.
Remove the Flat Tire and Install the Spare
With the wheel lifted, finish removing the lug nuts and set them aside somewhere clean so they don’t roll away or pick up dirt. Grip the tire with both hands and pull it straight toward you.
If it feels stuck to the hub — which can happen with rust or corrosion — resist the urge to force it or reach underneath the car. A few firm, controlled tugs usually does the trick.
Once the flat is off, set it aside out of the way, ideally near the vehicle rather than in a traffic lane. Take a quick look at the exposed hub for anything obviously wrong, but don’t attempt repairs you’re not equipped for while the car is still raised.
Now install the spare. Line up its center hole with the hub, keep the wheel level, and slide it into place. Once it’s seated properly, thread the lug nuts on by hand to start.
Tighten the Lug Nuts the Right Way
Start each lug nut by hand first — this prevents cross-threading, which can ruin the threads on the hub. Snug them lightly while the wheel is still raised, working in a crisscross or star pattern rather than moving around the wheel in a circle. This pattern seats the wheel evenly against the hub.
Once the spare is hand-tight all around, slowly lower the vehicle until the tire is firmly on the ground — this gives the wheel the resistance it needs so it doesn’t spin while you finish tightening. Remove the jack, then use the lug wrench to fully tighten each nut, again working in a crisscross pattern.
If you have access to a torque wrench, use it for the final tightening. Torque specifications vary by vehicle, so check your owner’s manual for the correct figure — most passenger cars fall somewhere between 80 and 100 foot-pounds, but SUVs and trucks often require more. Tightening unevenly or skipping the crisscross pattern can pull the wheel slightly off-center, which sometimes shows up later as a vibration at highway speeds.
| Step | What to Do |
| 1 | Park safely and apply the parking brake |
| 2 | Loosen the lug nuts slightly |
| 3 | Position the jack at the correct point |
| 4 | Raise the vehicle |
| 5 | Remove the lug nuts and flat tire |
| 6 | Install the spare |
| 7 | Hand-tighten the lug nuts |
| 8 | Lower the vehicle |
| 9 | Fully tighten the lug nuts |
| 10 | Check the spare before driving |
Check the Spare Before Driving
Don’t pull away just yet. Give the wheel a visual check to confirm it’s seated correctly and the lug nuts are tight. If you have a tire pressure gauge in the car, check the spare’s inflation too.
If it’s a temporary spare, look at the sidewall for the manufacturer’s speed and distance limits — these exist for a reason, since a donut isn’t built to handle the same stress as a full-size tire. You may also notice slightly different handling while it’s on, especially in curves or wet conditions. It’s a smart habit to have the lug-nut torque rechecked at a shop after driving a short distance.
Once you’re on the road, pack up the jack and lug wrench, and store the flat tire securely in your trunk. If the damage looks repairable, get it to a tire shop as soon as you reasonably can; if not, plan on replacing it with a tire that matches your vehicle’s specifications. If you’re driving on a temporary spare, don’t put off getting your regular tire sorted — donuts aren’t meant to stick around for weeks.
Common Mistakes to Avoid When Installing a Spare
A few small errors account for most tire-change mishaps. Watch out for these:
- Changing a tire on sloped or unstable ground
- Skipping the parking brake
- Using the wrong jack point
- Getting underneath a vehicle supported only by a jack
- Removing all lug nuts before the vehicle is properly supported
- Cross-threading lug nuts during installation
- Driving too fast on a temporary spare
- Ignoring the spare’s air pressure
- Continuing to drive if the car feels unstable afterward
- Treating a donut spare as a permanent fix
Also worth checking ahead of time: some newer vehicles skip the spare entirely and include a tire inflator kit instead. Your owner’s manual will tell you what your car actually carries.
When to Call Roadside Assistance
Not every flat tire situation is one you should handle solo. Call for help if you’re stuck on a narrow shoulder, near fast-moving traffic, dealing with bad weather, or in a spot where the vehicle simply can’t be lifted safely.
It’s also the smarter move if any of the following apply:
- The spare is missing, damaged, or flat
- The lug nuts won’t budge
- The wheel is stuck to the hub
- Your jack or lug wrench is broken
- You’re unsure of the correct jack point
- Your vehicle has an unusual tire or wheel setup
- You simply don’t feel comfortable lifting the car yourself
A roadside technician can swap the tire for you or arrange further service if the spare isn’t a viable option. There’s no shame in making that call — saving a few minutes is never worth a safety risk.
Frequently Asked Questions
How long does it take to put on a spare tire?
For most people, changing a tire takes 15 to 30 minutes. Stuck lug nuts or a tricky location can add extra time.
Can I drive normally on a spare tire?
It depends on the type. Temporary spares usually come with speed and mileage limits printed on the sidewall, so check those before driving.
Should I fully tighten the lug nuts while the car is still lifted?
No. Hand-tighten them while the wheel is raised, then finish tightening fully once the vehicle is back on the ground.
Can I use an old spare tire?
Check its age, condition, and air pressure first. If you see cracking or other visible damage, have it inspected before trusting it on the road.
What if my car doesn’t have a spare tire?
Some vehicles include a tire inflation kit instead. Check your owner’s manual to see what your car actually comes with.
Can a repaired flat tire go back on my car?
A qualified tire technician can tell you if the damage is safely repairable. Never reinstall a tire with damage beyond a simple repair.
What should I do after driving on a temporary spare?
Get your original tire repaired or replaced as soon as possible, then reinstall it and confirm the lug nuts are torqued to spec.
Conclusion
Putting on a spare tire isn’t complicated once you know the order of operations: park safely, loosen the lug nuts, use the correct jack point, install the spare, and double-check everything before driving off. If the roadside situation feels unsafe or something seems off with the tire or wheel, don’t push through it — roadside assistance is there for exactly that reason.